Showing posts with label technical. Show all posts

Tuesday, March 20, 2012

Technical Tuesday - Lightroom Presets

I'm not much for using Photoshop effects or Lightroom presets but I thought if I could find some for free, that were decent, I would share them.  I found them at Adobe Lightroom Presets web site.


I was really looking for some presets that imitated Instagram but all of those cost $10 - $40, and frankly I don't want to spend that kind of money not knowing what the results are going to be.  And for that matter I'm not one for heavily processed images anyways.  But sometimes I just want a certain feel to an image.  Maybe its a vintage look or a color cast, but its just a nice change of pace sometimes.  And I like to make those changes without a whole lot of thought.  Just click through the options and see if I like them or not.  So here's a comparison of some effects applied to an image I took of Link on his birthday that has a very vintage feel on its own.

The Original:


Analog:


Fine Art:


Lomo:


Old Polaroid:


Retro:


Toy:


Vintage:


What do you think about the differences?  My three favorite are Lomo, Retro and Toy.  I love the contrast of Lomo, the muted tones of Retro and the warmth of Toy.  Its always fun to experiment with these things, but like I said, I just don't use them that often.  However the ease of applying them in Lightroom makes them a lot more appealing than hours of work in Photoshop.  I'm a photographer not a digital artist.  I can see myself using these in the future to achieve very specific results and you can't beat them for free.


Tuesday, March 13, 2012

Technical Tuesday - Using A Reflector On An Overcast Day

It was rainy and gross here today.  The clouds were out, everything was muddy and I thought it would be a perfect time to try out a technique for Technical Tuesday.

We all use reflectors in broad daylight to fill in shadows from harsh sunlight (which I love), but we don't often use them in overcast or rainy days.  So here's a comparison of what its like using one versus not using one on a rain drenched day.

There was no reflector used here and in fact for the sake of showing, I made absolutely no adjustments to any of these images.  These photographs won't move mountains but they will illustrate the differences in the techniques.


You can see how much weaker the shadows are here and the subject pops from the background a lot more.


No reflector used here either.


Using the reflector really smooths the skin tones out here too.  The dark circles under the eye are almost completely removed.


No reflector used here.


Another benefit to using a reflector is getting a catch light in the eye.  Because its an overcast day you get that anyways, but you can use one just to make a catch light.  You don't even need to aim the reflection at the subject, just hold it up and if the eye can see it, it will show it.


Really even lighting isn't something that I do.  I typically like the light to be a little hard with good strong shadows.  Unlike a lot of photographers I don't shy away from shooting in broad daylight.  So this may not be a technique that I use often but its a good tool to have.

I suppose a should tell you a little bit about using the reflector.  The reflector that I use is 36".  It has a cover for it that has 4 colors.  Gold, silver, black and white.  The reflector itself is a translucent white.  All the images here were shot with the white cover for its soft reflective quality.  Had I wanted a harder edgier look I would have used the silver reflector and if I had wanted it warmer with hard light I would have used the gold cover.

On a day like today you don't have to worry about the direction you're reflecting so much because the light that is available isn't directional.  Its soft and coming from everywhere.  You pretty much just hold the reflector up close to the subject and reap the benefits.

If it were sunny outside you need to find the direction of the sun and bounce it back into the subjects face or rim light them with it.  You can choose where you make that light land.

Reflectors can be fun and shooting them on an overcast day is a bit abnormal.  But it gives the subject a lot more pop from the very muted surroundings.  Try it out and let me know how it works for you.

Tuesday, February 7, 2012

Technical Tuesday - Saberstrip Light Modifier

I've owned the Saberstrip light modifier for several months now.  In fact I bought it on cyber monday and got a killer deal on it, 1/2 price.  I think it was $60.  I've been anxious to try it out but just haven't had the opportunity.  And to be quite honest I was wven pressed for time to test it out tonight.

Here's what it looks like.

The bottom piece (where the little yellow twist knob is) loosens and pops off.  Then you just attach your strobe and wireless trigger.


Here's the set up I used for the test.  I love overhead soft lighting and this is a great tool to use for that.  I attached the Saberstrip to the head of a tripod and placed it on top of the dining room table.  Simple enough.  I actually love how incredibly simple this set up was.  I hate long arduos light setups.  Its not that I don't care about lighting, its just that I love simple lighting.  Thats why I use available light a lot and modify that to exactly what I want.  This modifier is just about as easy as that.

Front view:


Back view:


I started photographing my children first.  But they lost interest fast.  For the record using your kids when you are trying to test out a new piece of equipment is not a good idea.  They have no patience for it and could care less about what your testing.

I snapped this of myself, at arms length.


The only image I got of Scout before she decided what I was doing was lame.  I love how soft the light is but it still maintains really good shadows.  Sometimes shadows can be lost if the modifier wraps too softly around all the features of a person.


Lucky for me my wife came home right when I was testing.


I love this too.  With a little more direction to her I could have made a really good photograph here.  I love the black in this image.


Lastly my wife grabbed a frame of me before I shut everything down.  Its actually way better than the ones I took of them.  I love how the flash looks like a white line across the frame, very graphic.


All in all I think its a pretty cool modifier.  Its light weight, strong and easy to use.  The long slit in the tube gives a nice direction and width to the light.  Its very soft, but because its so small you still get good shadowing on the subject.  I would recommend it to other photographers, especially if you can get it for what I payed for it.

I will be experimenting more and more with studio lighting, but starting with the very basics.  I want to take my portrait game to a new level, and I want it to have a very painterly quality to it.  I think this modifier will really help that journey.

Here's the technical info:

Camera: Nikon D700
ISO: 100
File Format: RAW
White Balance: Auto, corrected in Adobe Lightroom 3
Lens: Nikon 50mm F/1.4
Aperture: F/4
Shutter Speed: 200
Flash: Nikon SB-28DX
Flash Power: 1/128
Flash Distance to Subject: 6 inches to 1 foot
Flash Triggers: Alien Bees CyberSync's

Tuesday, January 31, 2012

Technical Tuesday - Open Shade White Seamless

I'm starting a new section of the blog, I'm calling it technical Tuesday.  I'm doing it for a couple of reasons.

  1. I don't feel like I've been divulging enough technical information.
  2. I think you guys want more techniques than family photos.
  3. It makes it a whole lot easier to have set days where I know exactly what I'm going to blog about.
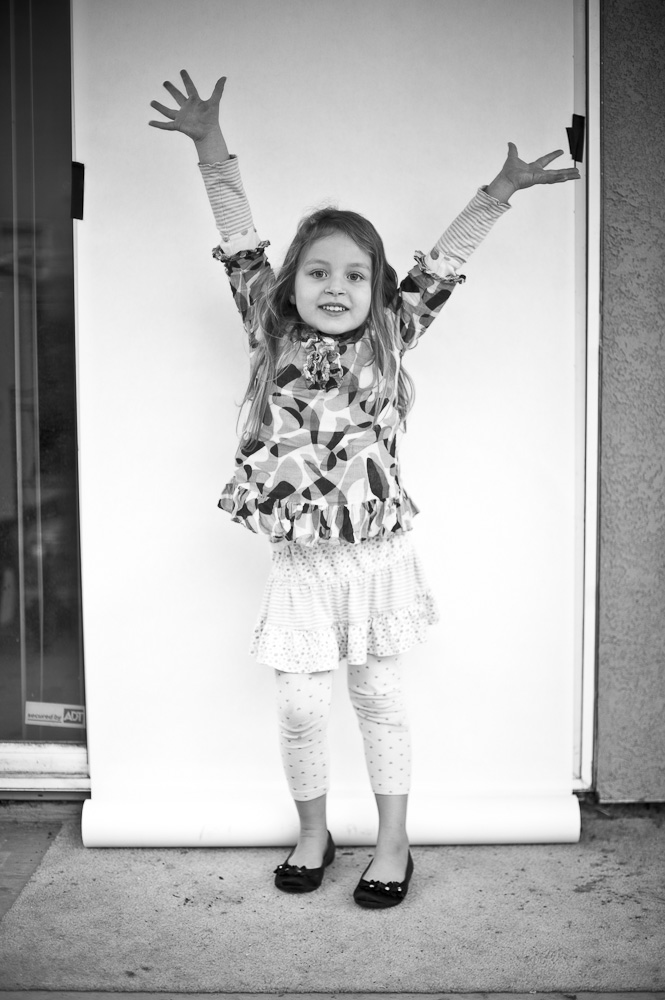
For my first Technical Tuesday post, I'm going to discuss shooting on a white background in open shade. I like to share ideas that don't take a whole lot of technical knowledge and can be done with minimal equipment.  This is definitely one of those ideas.

The first thing you need to do is acquire a seamless white backdrop or a large piece of white poster board. You will take that seamless/poster board and tape it to a wall on a porch or a wall in open shade.  Open shade is defined as an area that is shaded on a sunny day.  Essentially it removes all shadows from your subject.

Here's a tip for anyone using the "in camera" light meter.  When shooting in manual mode (always recommended) get in close on the white poster board, take your meter reading, and overexpose by one full f/stop.  The reason being, in-camera meters work off of 18% gray.  What that means is the camera always wants to make whites gray.  The same applies to snow.  Ever taken photos of snow and they don't look quite as white as you remember it was?  That's why.

Here's a photo showing the set up from the shoot.


See how simple it is?  So here are some of the photos from this little session with my kids.  The thing that a plain white background allows you to do is completely focus on the emotion and angle of your camera.  Find moments, find perspective, find something to say.


Give it a shot.  Literally.  Let me know if this was beneficial to your photography and please share your photos and your attempts with me.  I'll be glad to answer any technical questions about this post.  And in the mean time check out where I got the idea from, photographer Clay Enos:


Notice how beautiful the catch lights in the eyes are here, Clay is a master.  Enjoy.

Wednesday, January 11, 2012

How I Lit It #3 - Wavorly

This is one of my favorite sections of the blog.  I should start doing more of these how "How I Lit It" segments.  I like being able to show the technique in action.  

This image is from a shoot I did last year with the band Wavorly.  They've been categorized (and not by me) as a Christian rock band and there most recent record Conquering the Fear of Flight was released on Flicker records.  They hale from Tupelo, MS and have accents as thick as Mississippi mud.  They were really cool to work with, super laid back and would've tried just about anything.  You can't ask more from a subject.

I chose to show this image because it has a little more complexity to it than the last post I did on lighting, How I Lit It #2 - From Indian Lakes.  That post had no complexity at all, it was just window light.  This one, on the other hand, has two strobes and a couple other light sources.

So when approaching a shot like this, the first thing I do is nail down an exposure of the things that you can't change.  For this image, I couldn't do anything about the intensity of either the headlights or the interior lights behind the guys.  So I found an exposure that balanced both of those light sources well enough that they weren't fully blown out.  I wanted them to maintain some sort of detail.

The next thing I did was put a small strobe on a light stand and place it just outside of the drivers door.  I used a Nikon SB-28DX with a LumiQuest UltraSoft bounce for this light.  It looked OK initially but there just wasn't quite enough to it.

I thought it would be cool to have a light coming through the rear of the car, like headlights behind it.  So I set up a Nikon SB-24, zoomed to 85mm, bare and pointed right at the back window from above and left in the image.  I really like the way it highlighted the particles on the window and gave a rim light to the two in the back seat.


If I could go back there are a couple of other things that I would tighten up, but all in all I think it was a pretty successful image.  Thanks for checking back with me!

Tuesday, January 10, 2012

Black and White Filter Comparison

Here is a comparison of what you can achieve by adjusting the different color channels inside of the black and white filter in either Photoshop or Lightroom:

The Photoshop panel:


*This panel is made available when you add a "black and white" adjustment layer to your photo.

The Lightroom panel:


*This panel is made available when you are in the development tab while working on a given photograph.


This is an example of zeroing out all channels except for the red channel, which I have converted to 100%.


Notice how bright the skin becomes and how dark the eyes are.  Photographers manipulate the red channel, mostly, to apply an infrared look to images.

Now for the green channel.  Achieved by applying the same technique as above with the exception of zeroing out all channels but the green, which is increased to 100%.


Here we gained skin tone back as well as detail in the grass.

And the blue channel.  Achieved by applying the same technique as above with the exception of zeroing out all channels but the blue, which is increased to 100%.


With the blue channel you will increase the intensity of the shadows but more than likely will maintain good skin tone.  It offers a slightly darker look to an image.

You will typically find a balance between using all three channels.  In Photoshop I'm partial to leaving blue around 60 or 70% and altering the other two channels to my liking.  The sum of all three channels should be 100% or very close.  Otherwise you start to get images that do not look natural.

Photoshop and Lightroom, as well as other image editing applications, have made this very easy.  This use to be achieved by literally putting red, green or blue filters on your lens.  Then you had to adjust your exposure accordingly, normally by 2 or 3 stops.  This was of course when we were shooting film. 

You could still do it this way with digital.  However applying the filter post image capture allows you to change the look of the image and leaves you open to a lot more options.  If you use the filter on your lens you are essentially filtering that channel of light from ever hitting your sensor.  Thus removing it from the file information.  Less file info, less image quality.

Thought this could be useful for those wanting to learn more on the editing side of things.  Keep your questions coming, I have been getting some good ones.

Wednesday, December 21, 2011

A Brief Comparison of Lenses

Previously I've talked about aperture and shutter speed so here's a demonstration on lens length.  We all know that a 50mm is longer than a 35mm and a 200mm is longer than a 135mm.  This isn't meant to be a comparison of the obvious.

What I want you to pay closer attention to is how the length of the lens effects the backgrounds focus and how the longer lenses compress the image and bring the different layers of the image closer together.

All images shot at 1/30th of a second at F/4.  Camera was a Nikon D700.  Lenses used were the 50mm, f/1.4, 24-120mm f/3.5 - 5.6 and the 80 - 200mm f/2.8.

35mm:


50mm:


85mm:


135mm:


The change in compression and depth of field is the most obvious in the images taken at 85mm and 135mm.  Notice how the small milk pitcher on the left of the image falls completely out of focus at 135mm.  The aperture and focal point never change.

This is used best when trying to isolate your subject from the background.  Had I shot these images at f/2.8 most of the background at 135mm would be unrecognizable, but at 35mm it would be completely recognizable.

Also notice how the items in the photograph seem to be pulled closer together with the 135mm than with the 35mm.  At 35mm there seems to be a lot of space between the objects.  Try it for yourself.  Take some photos of your children and see what you like best.  They all have there uses and they all have there advantages.

Thursday, December 15, 2011

How I Lit It #2 - From Indian Lakes

For tonight's post, I thought I would show you a really easy lighting set up.  Ad when I say lighting set up I mean that there isn't any set up, its all available light.


The photos were taken on a shoot with From Indian Lakes at The Vault in Hollister, CA.  


From Indian Lakes is an amazing young band from Yosemite Valley, CA. This is what Blare Magazine says, "From Indian Lakes could easily be handpicked as on the best alternative rock bands most people have never heard of. The California quintet blend intelligent and touching lyrics with entrancing rock to create a musical organism that sounds like Brand New's poetic, yet darling, little brother."  Way better than I could have ever put it.  


The Vault is a new venue in Hollister, converted from an old bank, hence the name.  It has so many fantastic little spaces to shoot in I could literally spend days in there, and its a beautiful place to have a wedding or a party.  Eric Swan, the general manager, is a cool guy, he'll take care of you and make sure you get everything you need.


Enough with the plugs, lets talk about the lighting.  So here's the photo:


The image was made very simply.  We were on the second floor in an area that is used for theater productions.  There is a small stage, some stage lighting, a bar and I was trying to figure out how I could use this area for the shoot.  And I looked towards the windows which were covered with these old, heavy red velvet curtains.  They were blocking so much light except a little sliver that went down the wall and across the floor.  Jackpot.


So I took my exposure off of the little slice of wood shown on the left side of the frame then I arranged the guys to make sure there heads were as close as possible.  I did this by flip flopping them.  Every guy is actually laying a different direction than the guy next to him.  The result is an image with a massive amount of dead space, which could be used for text of any kind, i.e. posters, CD inserts, web pages.


Then I layed each band member down in the light and photographed them individually.


I like the results, what are your thoughts?  How can you use this technique in your work?  Keep the questions coming, I have several good ones that I'll be answering soon.  Thanks for checking back.